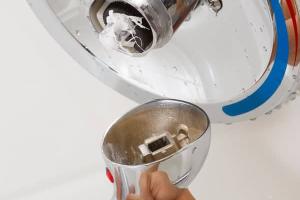
Ultimate Guide: How to Replace a Shower Valve Efficiently

-
Quick Links:
- 1. Introduction
- 2. Understanding Shower Valves
- 3. Tools and Materials Needed
- 4. Preparing for Replacement
- 5. Step-by-Step Guide to Replace a Shower Valve
- 6. Common Issues and Troubleshooting
- 7. Case Studies and Real-World Examples
- 8. Expert Insights
- 9. Conclusion
- 10. FAQs
1. Introduction
Replacing a shower valve may seem like a daunting task for many homeowners, but with the right tools and knowledge, it can be a straightforward DIY project. In this comprehensive guide, we will walk you through the entire process, from understanding what a shower valve is to the steps required for a successful replacement.
2. Understanding Shower Valves
A shower valve is a crucial component in your plumbing system, controlling the flow and temperature of water in your shower. There are several types of shower valves, including:
- Compression Valves: Common in older homes, these valves use rubber washers.
- Cartridge Valves: More modern, these valves use a cartridge to control water flow.
- Ball Valves: These provide precise temperature control and are often found in high-end showers.
- Thermostatic Valves: These maintain a constant water temperature, regardless of pressure changes.
Understanding the type of valve you have will help in selecting the right replacement part.
3. Tools and Materials Needed
Before starting the replacement process, gather the following tools and materials:
- Adjustable wrench
- Screwdriver (flathead and Phillips)
- Pliers
- Teflon tape
- Replacement shower valve
- Bucket (to catch any water)
- Rags or towels
4. Preparing for Replacement
Preparation is key to a successful replacement. Follow these steps:
- Turn off the water supply to your shower.
- Drain any remaining water in the pipes by opening the faucet.
- Remove any trim or cover plates to access the valve.
5. Step-by-Step Guide to Replace a Shower Valve
Now that you are prepared, follow these steps to replace your shower valve:
Step 1: Remove the Old Valve
Using your adjustable wrench, carefully disconnect the old valve from the plumbing. Be cautious to avoid damaging the surrounding pipes.
Step 2: Install the New Valve
Apply Teflon tape to the threads of the new valve and carefully screw it into place, ensuring a tight fit.
Step 3: Reassemble the Shower
Replace any trim or cover plates you removed earlier and secure them properly.
Step 4: Turn on the Water Supply
Slowly turn the water supply back on. Check for leaks around the new valve, tightening connections if necessary.
6. Common Issues and Troubleshooting
Even with careful installation, issues may arise. Here are some common problems and solutions:
- Leaking Valve: Ensure all connections are tight and check for damage to the valve or fittings.
- Inconsistent Water Temperature: This could indicate a malfunctioning thermostatic valve. Consider consulting a professional.
7. Case Studies and Real-World Examples
Many homeowners have successfully replaced their shower valves, with varying degrees of difficulty. For instance, a homeowner in Chicago replaced their valve in under two hours, saving over $200 in plumbing fees. This case demonstrates the feasibility of this project for most DIY enthusiasts.
8. Expert Insights
Plumbing professionals often emphasize the importance of choosing the right valve type for your needs. According to a study conducted by the American Society of Plumbing Engineers, most homeowners overlook the long-term benefits of investing in high-quality valves.
9. Conclusion
Replacing a shower valve is a manageable DIY project that can significantly improve your shower experience and save you money. With the right tools and knowledge, you can complete this task efficiently.
10. FAQs
1. How long does it take to replace a shower valve?
On average, it can take 1 to 3 hours, depending on your plumbing experience and the type of valve.
2. Do I need to shut off the water supply?
Yes, always shut off the water supply before starting any plumbing work.
3. Can I replace a shower valve without professional help?
Yes, if you follow the steps carefully and have the right tools, you can do it yourself.
4. What if I encounter rusted pipes?
If you find rust, it may be best to consult a professional, as this could indicate larger plumbing issues.
5. What type of valve should I buy?
Choose a valve that matches your existing plumbing and fits your needs—for example, choose a thermostatic valve for consistent temperature control.
6. Can I upgrade to a different valve type?
Yes, you can upgrade, but you may need to adjust the plumbing accordingly.
7. What are the signs of a faulty shower valve?
Common signs include leaking, inconsistent water temperature, and reduced water pressure.
8. Is it necessary to replace the entire valve?
In many cases, you can replace just the cartridge or parts of the valve, depending on the issue.
9. How do I maintain my shower valve?
Regularly check for leaks and clean any mineral build-up around the valve to ensure longevity.
10. Where can I find replacement parts?
Replacement parts are available at most hardware stores and online retailers.
References
For more detailed information, consider visiting the following resources:
- Angi - How to Replace a Shower Valve
- Family Handyman - Replace a Shower Valve
- Plumbing Today - Shower Valve Repair Tips
- Home Depot - How to Replace a Shower Valve
- HGTV - How to Replace a Shower Valve
Random Reads
- How to play sims 3 without cd
- How to play ps2 games on ps3
- How to write game instructions
- How to wire simple 120v electrical circuit
- How to wire a 220v outlet
- How to winterize your washer
- Turn flash drive xbox 360 memory unit
- Unlock android straight talk phone
- How to resize an image in microsoft paint
- Open opus files