This tutorial includes in-depth instructions regarding how to setup WordPress with Free CDN (Cloudflare). This helps in boosting your your WordPress blog loading time easily and allow website owners to decrease possible bounce rate, which mostly occurs due to high loading time.
When it comes to site loading time of a WordPress blog, every seconds costs. Probably, if a website is taking more time to load, obviously people end up to abandon using it. Therefore, the bounce rate will jump up, leading websites to bad search engine ranking.
If you are also running a WordPress blog or site, then you might be thinking of to fix up site’s bounce rate, and this is where CDN (Content Delivery Network) helps. While choosing the best CDN for a low budget administrators, Cloudflare is the best option as it provides a free plan as well for new comers. And in this tutorial, we will discuss how to setup WordPress with free CDN (Cloudflare).
About Cloudflare CDN
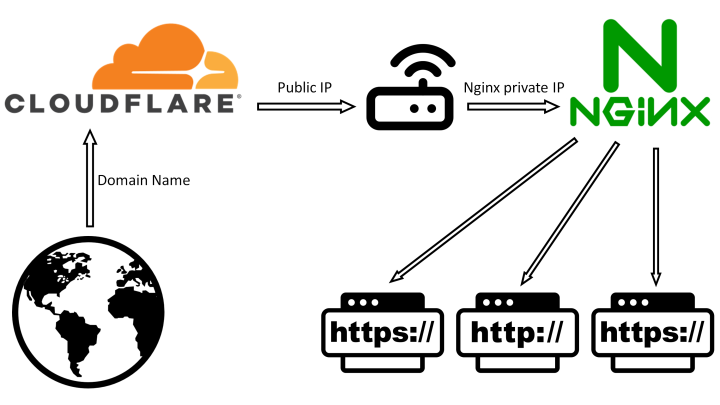
Cloudflare is one of the widely used CDN, whose most lovable feature is to increase website’s loading time. Mainly, a CDN use to keep multiple copies of your website’s data distributed in worldwide Proxy Servers.
So, when a user opens a domain connected with CDN, their browser’s request are sent to the nearest server according to their location. And this helps the website to load faster on browsers.
In addition to this, using a Cloudflare CDN also boosts your website’s security by protecting it against DDoS attacks. So, this feature also ensures your concern about data privacy.
Cloudflare and WordPress blog
Since, this article is all about how to setup Cloudflare CDN for WordPress blog, you might be itching how it can be helpful. Here comes the key benefits if you use Cloudlfare with your WordPress blog:
To achieve faster response time: Since the Cloudflare uses the most advanced technology to provide efficient data transfer from one server to another, this feature easily reduces the loading time of WordPress blog when a visitor opens the site, which improves overall user experience.
To achieve site protection: Cloudflare offers various security settings to protect a WordPress blog against potential online threats. Some of the features are protection against DDoS attacks and web application firewall (WAF).
To achieve free SSL certificate: SSL (Secure Socket Layer) is well known as a good ranking factor. Also, this protects a WordPress blog by ensuring only authorized computers or browsers can access it. This technology offers end to end encryption.
To achieve automatic platform optimization: Connecting a WordPress blog with Cloudflare helps boosting overall performance by offering auto-optimization. It includes different processes to enhance site’s performance, that includes image resizing, and automatic cache purge while the website updates.
How to setup WordPress with free CDN – Cloudflare
Configuring Cloudflare free CDN with WordPress blog is quite easy and takes just a few minutes. You can do this manually or through your hosting provider (Many hosting provider offers easy steps to integrate WordPress site with Cloudflare) as well. To setup your WordPress blog with free CDN through hosting provider, contact the hosting provider support. However, if you want to configure it manually, follow the instructions ahead:
1: Create a free Cloudflare account
Since the Cloudflare offers free account as well, you needn’t to spend a budget to connect your WordPress blog with free CDN. Just follow the steps:
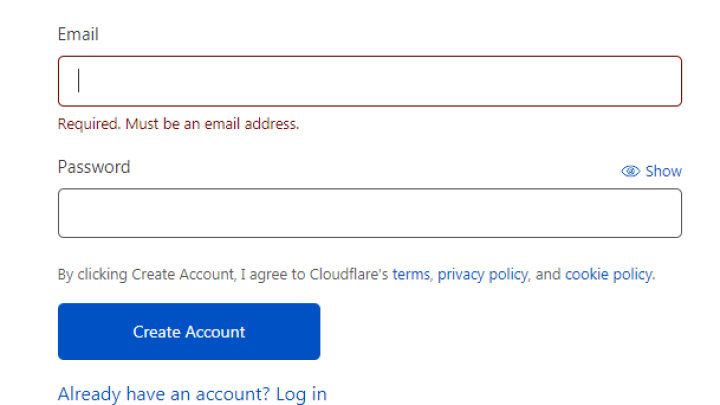
1. Open your browser and visit Cloudflare official website, and click on Sign Up button.
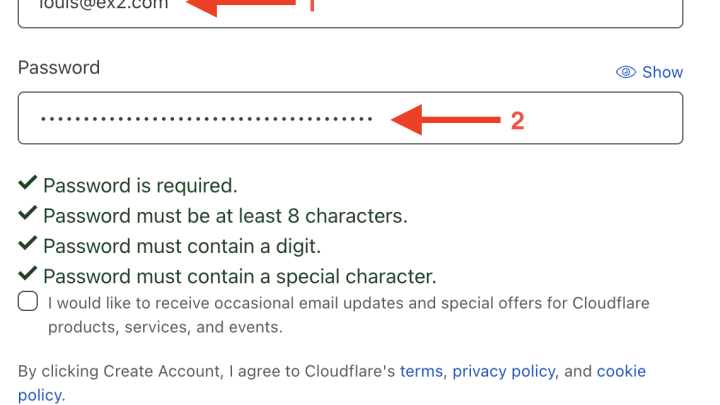
2. Assign your email address and setup a password, and press on Create Account.
3. Now, you have successfully created a free account with Cloudflare.
2: Adding WordPress blog domain to Cloudlfare
Once done with creating an account with Cloudflare, you need to add your domain with newly created account. Just follow the steps:
1. Go to dashboard of your Cloudflare, and click on Add Site button.

2. Add the URL of your WordPress blog. You can add many websites as you want, even with a free version.
3. Now, you will be asked to choose your preferred plan, and you should select Free plan that is for a blog or personal website. The free version basically includes all general features to allow your WordPress blog running with enhanced performance and security.

Note: Users who are running an e-commerce website or have a site with high-traffic can choose Pro or Business or Enterprise plans to achieve the maximum performance benefits.
3: Check DNS of WordPress Domain Name
Once you add WordPress site to free Cloudflare account, it will show you with DNS information of the domain. You can enable or disable Cloudflare for certain subdomains here.
In order to activate, toggle the cloud icon to orange color as mentioned in the image below.

It’s recommended to enable Cloudflare for your www and non-www domain to allow the CDN work with both of the versions.
Now, press Continue button to proceed with next step.
Note: We suggest you to disable Cloudflare for cPanel, mail, FTP, or other shown subdomain as it can cause DNS issues later.
4: Point Domain to Cloudflare Nameservers
1. Once you click on Continue button, the you will be asked to point your domain to Cloudflare Nameservers.
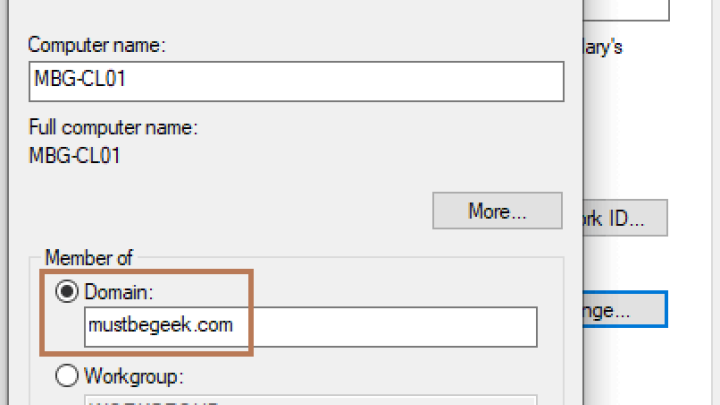
2. Copy those Nameservers on a plain text, and open a new tab on browser to visit your Hosting cPanel. In the control panel, you can select the domain and change its Nameservers’ values to assign custom values, and paste the CloudFlare Nameservers and click on the option to Update Nameservers.
3. Once done, go back to Cloudflare and press Done. It may take up to 72 hours for DNS changes to take in effect. Once the update is done, you will be notified through an email confirmation.
Since the update process may take a bit long time, you can configure some more settings in Cloudflare account in the meanwhile. To learn it, proceed with next step.
5. Configure HTTPS (Free SSL) Settings

In order to setup HTTPS for WordPress blog, just follow the steps mentioned.
1. Navigate to SSL tab in Cloudflare dashboard. You will get two types of SSL settings either Full SSL or Flexible SSL. Full SSL is used when you have an existing SSL, or the second one is for those who don’t have any SSL.
More other different between using Flexible SSL and Full SSL is, the first one provides security while data transfer between WordPress site and Cloudflare only, while the second one offers end-to-end protection from site to visitor’s server.
2. After you setup the SSL settings, head to Edge Certificates section, and Turn on Always Use HTTPS option. This action may take a few hours to complete.
6. Install and configure Cloudflare WordPress Plugin (Optional)
Cloudlfare WordPress Plugin is basically a tool that offers a number of features to handle your CDN services through WordPress site. Some of the features are One-click WordPress optimization, WAF rulesets, Automatic cache purge, Statistics, and many more.
In order to take benefits of this,, you need to install Cloudflare WordPress plugin in your WordPress blog. Here’s the instructions.
1. Login to your WordPress blog. In the dashboard, Choose Plugins > Add New.

2. Search for Cloudflare WordPress plugin. Install and activate it on your blog.
3. Navigate to Settings page, and select Cloudflare.
4. Once the Cloudflare setting page appears, click on Get your API Key from here, and you will be redirected to Cloudflare site.

5. Provide the Cloudflare login credentials to login and navigate to API Tokens tab, and select View from Global API Key option there.

6. You will be asked to enter the password, just feed it and copy the provided API Key.
7. Get back to plugin’s Settings page and paste the copied API Key in the login field. Once done, click on Save API Credentials.
8. So, you have successfully set up WordPress blog with free CDN, and the installed plugin is ready to allow you dealing with various settings.
More Cloudflare Features: To boost up WordPress performance
Till now, you have already set up WordPress blog with free CDN using cloudflare. No matters you have a free plan, still the Cloudlfare has to offer many features to boost up your WordPress blog performance. Look through the features here in detail:
1. Auto Minify
This setting is applicable for javascript, CSS and HTML. Using this feature, website’s unnecessary characters will be automatically cleaned up.
2. Brotli
Enabling this feature helps ensuring quick data tranfer between servers and browsers. It compresses files like images, texts, and fonts to make site load faster.
3. Rocket Loader
This option is helps in boosting WordPress blog performance by increasing page load speeds, specially for those sites which use javascripts. It ensures the correct loading of text, images and fonts on site.
4. Firewall
The Firewall option in Cloudflare offers users to protect their site against various potential threats. For a free plan user, it offers DDoS protection and optimized security rules for WordPress.
5. Network
This can be useful to enhance website performance by allowing to use HTTP/2 and WebSocket for enhanced site functionality.
6. Page Rules
Under this feature, users can set up HTTPS rewrite rules and preferences for particular WordPress pages.
7. Image Resizing
Since the image on any site takes much time to load completely, bigger size may impact WordPress loading time. So Image Resizing feature minimizes the image measurement to boost the performance.
8. Mirage
This feature technically loads website content faster, while puts the image placeholders. The image keeps loading later on. This offers users to get your site content faster than just seeing a blank page.
9. Polish
Polish compresses the WordPress site images by removing unnecessary image details, thus the compressed images take less time to load, and enhances the browsing performance.
Conclusion:
To learn how to setup WordPress blog with free CDN using Cloudflare in this tutorial might be helpful for you. The whole process is very easy and quick as well. We hope you liked this post. If you need to suggest you edits, you can click Suggest Us to share your views. Also, you can comment in the section below.

Nishant Verma is a senior web developer who love to share his knowledge about Linux, SysAdmin, and more other web handlers. Currently, he loves to write as content contributor for ServoNode.