Mastering Continuity Testing with a Multimeter: A Comprehensive Guide

-
Quick Links:
- Introduction
- What is Continuity?
- Why Test Continuity?
- Understanding the Multimeter
- How to Prepare for Testing Continuity
- Step-by-Step Guide to Testing Continuity
- Common Issues and Solutions
- Case Studies
- Expert Insights
- Safety Tips
- FAQs
Introduction
Testing continuity is a fundamental skill for anyone working with electrical systems, whether in professional settings or DIY projects. A multimeter is an essential tool that plays a crucial role in diagnosing electrical issues, ensuring safety, and maintaining functionality in circuits. This comprehensive guide will take you through everything you need to know about testing continuity with a multimeter, from the basics to advanced techniques.
What is Continuity?
Continuity refers to the uninterrupted path for current flow in an electrical circuit. When a circuit is continuous, electricity can flow freely from one point to another. Conversely, a break in continuity means there is an interruption, which could result in malfunctioning devices or systems.
Why Test Continuity?
Testing continuity is essential for several reasons:
- Diagnosing Circuit Problems: Identifying breaks or faults in electrical systems.
- Safety: Ensuring that circuits are intact before applying power.
- Maintenance: Checking connections and components for wear and tear.
Understanding the Multimeter
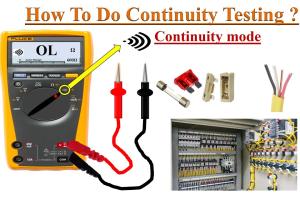
A multimeter is a versatile device that can measure voltage, current, and resistance. It typically has two probes: a red probe for positive readings and a black probe for negative readings or ground. Most multimeters have a specific setting for continuity testing, often indicated by a soundwave symbol or diode symbol.
How to Prepare for Testing Continuity
Before testing continuity, follow these preparation steps:
- Ensure the device is powered off to prevent accidental shocks.
- Disconnect the circuit or component from power sources.
- Set the multimeter to the continuity testing mode.
Step-by-Step Guide to Testing Continuity
Follow these steps to effectively test continuity:
- Connect the Probes: Insert the black probe into the COM terminal and the red probe into the VΩmA terminal.
- Select the Continuity Setting: Turn the multimeter dial to the continuity mode.
- Touch the Probes to the Points: Place the probes on the two points of the circuit you wish to test.
- Listen for the Beep: If there is continuity, the multimeter will beep or show a reading close to zero ohms.
- Interpret the Results: A lack of sound or a reading of infinity indicates a break in the circuit.
Common Issues and Solutions
While testing continuity, you might encounter several issues. Here are some common problems and their solutions:
- No Sound or Reading: Ensure the multimeter is set to the correct mode and check the battery and probes.
- Inconsistent Readings: Clean the probe tips and ensure good contact with the test points.
- Incorrect Wiring: Verify the circuit connections to ensure they match the schematic.
Case Studies
To illustrate the importance of continuity testing, let’s explore a couple of real-world scenarios:
Case Study 1: Residential Wiring Issues
A homeowner experienced flickering lights. Testing continuity revealed a break in the wiring, which was repaired, restoring the lights.
Case Study 2: Automotive Electrical Problem
A mechanic found a faulty ignition system by testing continuity in the wiring harness, pinpointing the issue to a corroded connector.
Expert Insights
Experts recommend routinely testing continuity in high-use circuits to prevent failures. Regular checks can identify issues before they escalate, saving time and money in repairs.
Safety Tips
When testing continuity, keep safety in mind:
- Always power down and unplug devices before testing.
- Use insulated probes to avoid shocks.
- Wear safety glasses to protect against electrical arcing.
FAQs
1. What does a multimeter beep mean during a continuity test?
A beep indicates continuity, meaning there is a complete electrical path between the two points you are testing.
2. Can I test continuity on live circuits?
No, testing continuity should always be done on powered-off circuits to avoid damage to the multimeter and ensure your safety.
3. How do I know if my multimeter is working correctly?
Test the multimeter on a known good circuit or component to ensure it beeps or shows a proper reading.
4. What is the difference between a multimeter and a continuity tester?
A continuity tester is simpler and only tests for continuity, while a multimeter can measure voltage, current, and resistance as well.
5. Can I use a multimeter for testing diodes?
Yes, most multimeters have a diode testing mode, which can also indicate continuity in the same way.
6. What is the typical resistance value for continuity?
A typical reading for continuity is close to zero ohms, indicating a good connection.
7. How often should I test continuity?
It’s advisable to test continuity whenever you suspect an issue or as part of regular maintenance checks.
8. Is it safe to use a multimeter for troubleshooting?
Yes, as long as you follow safety guidelines and ensure the circuit is powered off before testing.
9. What should I do if I find an open circuit?
Trace the circuit to locate the break and repair or replace the faulty component.
10. Can I repair a circuit myself?
Yes, if you have the necessary skills and tools, many circuit repairs can be done safely by yourself.