Mastering Excel: 3 Effortless Steps to Zip Your Excel Files

-
Quick Links:
- Introduction
- Why Zip Excel Files?
- Step 1: Selecting the Excel File
- Step 2: Using the Zip Compression Tool
- Step 3: Sharing the Zipped File
- Case Studies
- Expert Insights
- Conclusion
- FAQs
Introduction
In today's digital age, managing files efficiently is crucial for both personal and professional tasks. One common challenge users face is how to share large Excel files without facing issues like email size limits or slow upload times. Zipping an Excel file can significantly reduce its size, making it easier to share. In this guide, we will explore how to zip an Excel file in just three easy steps, enhancing your file management skills.
Why Zip Excel Files?
Before diving into the steps, let's understand why zipping Excel files is beneficial:
- Reduced File Size: Compressing files makes them smaller, which is essential when you need to send them via email or upload them to a cloud service.
- Organized File Management: Zipping allows you to combine multiple files into one, simplifying storage and sharing.
- Enhanced Security: Zipped files can be password-protected, adding an extra layer of security for sensitive information.
Step 1: Selecting the Excel File
The first step in zipping an Excel file is to choose the specific file you want to compress. Here’s how to do it:
- Open your file explorer or finder.
- Navigate to the folder containing the Excel file.
- Select the Excel file you wish to zip by clicking on it once.
Make sure that you have saved all changes to your Excel file before moving on to the next step.
Step 2: Using the Zip Compression Tool
Once you’ve selected the Excel file, it’s time to zip it. Depending on your operating system, the process may vary slightly:
For Windows Users:
- Right-click on the selected Excel file.
- Hover over the “Send to” option in the context menu.
- Select “Compressed (zipped) folder” from the submenu.
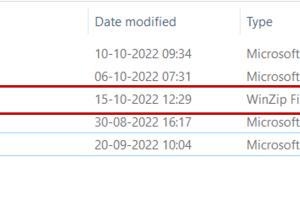
- A new zipped folder will appear in the same directory, containing your Excel file.
For Mac Users:
- Right-click (or Ctrl-click) on the selected Excel file.
- Select “Compress [file name]” from the context menu.
- A new zipped file will be created in the same directory.
Step 3: Sharing the Zipped File
Now that your Excel file is zipped, you can easily share it via email or upload it to a file-sharing service. Here’s how to do that:
- Open your email client or file-sharing platform.
- Select the option to attach a file.
- Navigate to the zipped file and select it for upload.
- Compose your message and send it to the intended recipient.
By zipping your Excel files, you can ensure a smoother sharing experience without the hassle of large file sizes.
Case Studies
Let’s look at a couple of case studies that illustrate the practical benefits of zipping Excel files:
Case Study 1: Corporate Training Programs
A corporate training department often sends large Excel files containing training schedules and employee data. By zipping these files, they reduced the size from 10 MB to 2 MB, facilitating quicker email transmission and ensuring that employees received essential documents without delay.
Case Study 2: Academic Research
Researchers at a university frequently share datasets in Excel format. They found that zipping their files decreased upload times to cloud storage from several minutes to just seconds, allowing for more efficient collaboration on research projects.
Expert Insights
Experts recommend zipping files not only for size reduction but also for better organization. A file management expert notes, “Combining multiple files into a single zipped folder can drastically improve the workflow, especially for teams that collaborate on projects.” Utilizing zipping tools also allows users to maintain better control over their data security.
Conclusion
Zipping Excel files is a simple yet effective method for managing file sizes and improving your file-sharing capabilities. By following the three easy steps outlined in this guide, you can streamline your work processes, enhance data security, and collaborate efficiently with others. Start zipping your Excel files today and experience the benefits firsthand!
FAQs
1. What is a zipped file?
A zipped file is a compressed file that reduces the size of one or more files for easier storage and sharing.
2. Why should I zip my Excel files?
Zipping your Excel files reduces their size, making them easier to share and store.
3. Can I password-protect a zipped file?
Yes, many compression tools allow you to add password protection to zipped files for enhanced security.
4. Are there any risks to zipping files?
There are minimal risks; however, if the zipped file is corrupted, you may lose access to the original files.
5. What software can I use to zip files?
You can use built-in tools in Windows and macOS, or third-party software like WinRAR or 7-Zip.
6. Is zipping files the same as archiving?
While both processes compress files, archiving often involves organizing multiple files into a single format without focusing on size reduction.
7. Can I unzip a file on any device?
Most devices support unzipping files, but you may need specific software on some platforms.
8. How do I unzip a file?
Right-click the zipped file and select “Extract” or “Unzip,” or use a dedicated extraction tool.
9. Will zipping an Excel file affect its data?
No, zipping an Excel file does not alter its data; it only compresses the file size.
10. What is the maximum size for zipped files?
The size limit depends on the operating system and file system, but most systems can handle large zipped files exceeding several GBs.