How to Efficiently Move Disk Space Between C and D Drives on Windows 11, 10, 8, & 7

-
Quick Links:
- Introduction
- Understanding Disk Partitions
- Why Move Disk Space Between Drives?
- Preparation Steps
- Using Disk Management Tool
- Using Third-Party Tools
- Case Studies
- Expert Insights
- Conclusion
- FAQs
Introduction
Moving disk space between your C and D drives can be a necessary task for many Windows users across various versions, including Windows 11, 10, 8, and 7. As applications grow in size and data accumulates, it often becomes essential to manage your disk space effectively. This comprehensive guide will walk you through the steps to efficiently move disk space between these drives on your Windows operating system.Understanding Disk Partitions
Disk partitions are portions of a hard drive that are divided to create separate areas for data storage. The C drive typically holds the operating system and applications, while the D drive is often used for personal files and media.Types of Disk Partitions
- **Primary Partition**: A partition that can be used to boot an operating system. - **Extended Partition**: A type of partition that can contain multiple logical partitions. - **Logical Partition**: A subdivision of an extended partition.Why Move Disk Space Between Drives?
1. **Free Up Space**: Applications and system files on the C drive can consume significant space. 2. **Improve Performance**: Distributing data can help enhance the performance of your computer. 3. **Organize Data**: Keeping personal files on the D drive can help maintain organization and efficiency.Preparation Steps
Before starting the process, ensure you have: - **Backed Up Important Data**: Always back up your important files before making changes to your disk partitions. - **Checked Disk Space**: Assess how much space you have on your C and D drives. - **Closed Unnecessary Applications**: To prevent any interruptions during the process.Using Disk Management Tool
Windows has a built-in Disk Management tool that allows you to manage your disk partitions.Step-by-Step Guide to Using Disk Management
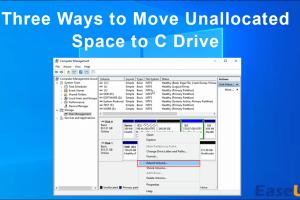
1. **Open Disk Management**: Press `Windows + R`, type `diskmgmt.msc`, and hit `Enter`. 2. **Shrink the C Drive**: - Right-click on the C drive and select `Shrink Volume`. - Enter the amount of space to shrink and click `Shrink`. 3. **Extend the D Drive**: - Right-click on the D drive and select `Extend Volume`. - Follow the wizard to allocate the unallocated space from the C drive to the D drive.Using Third-Party Tools
If the built-in Disk Management tool doesn’t meet your needs, consider using third-party software like EaseUS Partition Master or MiniTool Partition Wizard.Step-by-Step Guide to Using EaseUS Partition Master
1. **Download and Install**: Get the software from the official EaseUS website. 2. **Launch the Program**: Open EaseUS Partition Master. 3. **Select the C Drive**: Right-click on the C drive and choose `Resize/Move`. 4. **Adjust the Size**: Drag the partition border to shrink it. 5. **Select the D Drive**: Right-click on the D drive and choose `Resize/Move` to extend it with the unallocated space. 6. **Apply Changes**: Click `Execute Operation` and confirm.Case Studies
- **Case Study 1**: John, a Windows 10 user, needed more space on his D drive for media files. After resizing his C drive using Disk Management, he successfully allocated the space, resulting in improved file access times. - **Case Study 2**: Sarah, using Windows 11, opted for EaseUS Partition Master to move space between her drives. She found the user interface intuitive and completed the task without data loss.Expert Insights
Experts recommend periodically checking your disk usage and managing partitions to avoid performance degradation. Regular maintenance can prolong the lifespan of your hard drive and improve overall system efficiency.Conclusion
Moving disk space between your C and D drives is a straightforward process, whether you choose to use Windows built-in tools or third-party software. Properly managing your disk space can lead to a more efficient and organized computing experience.FAQs
1. **Can I move disk space without losing data?** - Yes, if you properly follow the instructions and back up your data. 2. **What tools can I use to move disk space?** - You can use Windows Disk Management or third-party tools like EaseUS Partition Master. 3. **Is it safe to resize partitions?** - It is generally safe, but data backup is crucial before proceeding. 4. **How much space should I move?** - It depends on your needs; assess what applications and files are taking up space. 5. **Can I move space from D to C?** - Yes, the process is similar; just ensure you have unallocated space available. 6. **Will moving disk space affect my operating system?** - No, if done correctly, your OS should remain unaffected. 7. **What happens if I run out of space on C drive?** - Your system may slow down, and you might face issues with installing new applications. 8. **Can I undo the changes after resizing?** - Most third-party tools offer options to revert changes if issues arise. 9. **Is there a limit to how much space I can move?** - You can only move as much space as is available from the source partition. 10. **Will my files remain intact?** - Yes, if you follow the steps carefully, your files should remain intact.Random Reads
- How to open tmp files
- How to open torrent file
- Mastering weapon enchantment esonline
- Mastering windows command prompt python
- Simple ways to clean a cd and remove scratches
- Identifying fake samsung chargers
- Identify motherboard type
- How to make heart symbol iphone ipad
- How to store christmas lights
- How to stream gopro to pc vlc