The Ultimate Guide to Inserting Images with HTML: Best Practices and Techniques

-
Quick Links:
- Introduction
- Understanding the HTML Image Tag
- Basic Syntax for Inserting Images
- Image Format Types
- Advanced Image Attributes
- Making Images Responsive
- Accessibility Best Practices
- Case Studies
- Common Mistakes to Avoid
- Conclusion
- FAQs
Introduction
In the digital landscape, images play a pivotal role in communicating ideas, enhancing user engagement, and improving SEO. Whether you're a novice coder or an experienced web developer, knowing how to insert images into your HTML documents is essential. This guide will take you through everything you need to know about inserting images with HTML, from basic syntax to advanced techniques, ensuring your web pages are visually appealing and functionally effective.
Understanding the HTML Image Tag
The HTML image tag, represented as ``, is a powerful tool that allows you to embed images in your HTML documents. Unlike other HTML tags, the `
` tag is self-closing, meaning it does not require a closing tag. The fundamental structure of the `
` tag consists of various attributes that define how the image will be displayed.
Basic Syntax for Inserting Images
<img src="image-url.jpg" alt="description of image">
The two most important attributes of the `` tag are:
- src: Specifies the path to the image file.
- alt: Provides alternative text for screen readers and browsers that cannot display the image.
Image Format Types
When inserting images, understanding the different image formats can greatly affect the performance and appearance of your website. The most common formats include:
- JPEG: Best for photographs; supports millions of colors.
- PNG: Ideal for graphics with transparency; maintains high quality.
- GIF: Supports animations; limited color palette.
- SVG: Scalable vector graphics; perfect for logos and icons.
Advanced Image Attributes
Beyond the basic attributes, there are several advanced attributes that can enhance how images are displayed:
- width: Sets the width of the image.
- height: Sets the height of the image.
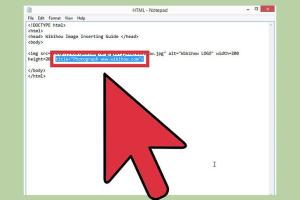
- title: Provides additional information about the image on hover.
Making Images Responsive
In today’s mobile-first world, ensuring that your images are responsive is crucial. This can be achieved using CSS:
img {
    max-width: 100%;
    height: auto;
}
This CSS rule ensures that images scale appropriately with the size of the screen, providing a better user experience across devices.
Accessibility Best Practices
Accessibility should be a key consideration when inserting images. Using the alt attribute correctly helps screen readers convey information to users with visual impairments. Some best practices include:
- Use descriptive alt text that conveys the image's purpose.
- Avoid using "image of" or "picture of" in alt text.
- For decorative images, you can use an empty alt attribute (alt="").
Case Studies
To illustrate the importance of inserting images effectively, let’s look at a few case studies:
Case Study 1: E-commerce Website
An online clothing retailer improved its conversion rate by 30% after optimizing their product images with proper alt attributes and responsive design, enhancing user engagement and satisfaction.
Case Study 2: Blog Post Performance
A food blog saw a 50% increase in traffic after implementing high-quality images with optimized loading times and proper alt text, leading to better SEO rankings.
Common Mistakes to Avoid
Avoiding common pitfalls can save time and enhance your website's performance. Here are some mistakes to watch out for:
- Not using alt text.
- Using images that are too large, affecting load times.
- Neglecting to optimize images for different devices.
Conclusion
Inserting images in HTML is a fundamental skill that enhances your web development capabilities. By following the best practices outlined in this guide, you can ensure that your images are not only visually appealing but also optimized for performance and accessibility. Remember to keep experimenting and learning as web standards evolve.
FAQs
1. What is the HTML tag for images?
The HTML tag for images is <img>.
2. How do I make an image responsive in HTML?
Use CSS to set max-width to 100% and height to auto.
3. What is the alt attribute used for?
The alt attribute provides alternative text for images, improving accessibility.
4. Can I use images from the internet in my HTML?
Yes, but ensure you have the right to use them and provide proper attribution.
5. What image formats are best for the web?
JPEG, PNG, and SVG are the most commonly used formats for web images.
6. How do I optimize images for SEO?
Use descriptive file names, alt text, and compress images to reduce file size.
7. What is the significance of using high-quality images?
High-quality images enhance user experience and can improve engagement and conversion rates.
8. Is there a limit to the size of images I can use?
While there is no strict limit, larger images can slow down your website, affecting SEO and user experience.
9. How do I center an image in HTML?
Wrap the image in a block-level element and use CSS to set text-align to center.
10. Can images slow down my website?
Yes, unoptimized images can significantly slow down load times, negatively impacting user experience.
External References
- W3Schools: HTML Images
- MDN Web Docs: HTML img Element
- Google Developers: Optimize Images
- The A11Y Project: Alt Text
- Smashing Magazine: Understanding Image Optimization
Random Reads