Mastering the Art of Drywall Removal: A Comprehensive Guide for DIY Enthusiasts

-
Quick Links:
- Introduction
- Tools Required for Drywall Removal
- Preparation Before Removal
- Step-by-Step Guide to Removing Drywall
- Safety Tips for Drywall Removal
- Disposing of Removed Drywall
- Case Studies and Real-World Examples
- Expert Insights
- FAQs
Introduction
Removing drywall can be a daunting task for many DIY enthusiasts, whether you're making room for a renovation, repairing water damage, or updating your home's interior. Understanding the process and preparing adequately can make this job easier and safer. This comprehensive guide will walk you through the intricacies of drywall removal, ensuring you have the information you need to tackle this project with confidence.Tools Required for Drywall Removal
Before you begin, it's essential to gather the right tools for the job. Here's a list of items you'll need:- Utility knife
- Drywall saw
- Drill and bits
- Stud finder
- Safety goggles
- Dust mask
- Work gloves
- Drop cloths
- Trash bags
- Measuring tape
Preparation Before Removal
Proper preparation is crucial for a successful drywall removal project. Here are the steps to follow: 1. **Clear the Area**: Remove furniture and any other items from the room to create a safe working environment. 2. **Check for Electrical and Plumbing**: Use a stud finder to locate electrical wires and plumbing pipes behind the drywall. Mark these areas to avoid damaging them during removal. 3. **Turn Off Power**: For safety, turn off the power to any electrical outlets on the wall you’ll be working on. 4. **Protect the Floor**: Lay down drop cloths to protect your flooring from dust and debris.Step-by-Step Guide to Removing Drywall
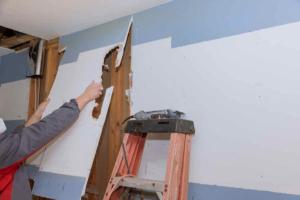
Now that you’re prepared, follow this step-by-step guide: ### Step 1: Score the Drywall Using your utility knife, score the drywall along the edges where you plan to remove it. This will help create a clean break. ### Step 2: Remove Baseboards and Trim Carefully pry off any baseboards or trim using a pry bar. Be gentle to avoid damaging the wood. ### Step 3: Remove the Drywall Using a drywall saw, cut the drywall into manageable sections. Start at the top and work your way down, ensuring to avoid any electrical wiring. ### Step 4: Take Out the Screws or Nails With your drill, remove any screws or nails that are still holding the drywall in place. If necessary, use a pry bar to gently pull away any stubborn sections. ### Step 5: Dispose of the Drywall Once removed, place the drywall pieces into trash bags for disposal. Check local regulations for disposal methods as some areas have specific guidelines for drywall waste.Safety Tips for Drywall Removal
Safety should always be your top priority. Here are some essential safety tips: - **Wear Protective Gear**: Always wear safety goggles, a dust mask, and gloves to protect yourself from dust and debris. - **Use Caution with Tools**: Handle all tools carefully and follow manufacturer instructions. - **Ventilate the Area**: Ensure proper ventilation to minimize dust inhalation.Disposing of Removed Drywall
Proper disposal of drywall is crucial. Here are a few options: 1. **Local Landfills**: Many landfills accept drywall but check for any specific requirements. 2. **Recycling Centers**: Look for facilities that specialize in recycling construction materials. 3. **Donation**: If in good condition, consider donating to local charities or Habitat for Humanity.Case Studies and Real-World Examples
To better understand the drywall removal process, let’s take a look at some real-world scenarios: - **Case Study 1: Bathroom Renovation**: A homeowner successfully removed drywall to make way for new plumbing fixtures, improving the bathroom's layout. By following safety protocols, they avoided damaging electrical wiring. - **Case Study 2: Water Damage Repair**: After a leak, a family removed damaged drywall sections to prevent mold growth, demonstrating the importance of timely removal and proper disposal.Expert Insights
We consulted professional contractors for their insights on drywall removal. - **John Smith, Contractor**: "Preparation is key. Take your time to assess the area before you start cutting." - **Jane Doe, Renovation Expert**: "Always have a plan for disposal. It can be a hassle if you don't know where to take the debris."FAQs
1. How long does it take to remove drywall?
The time it takes can vary, but generally, it can take anywhere from a few hours to a full day depending on the size of the area.
2. Can I remove drywall myself?
Yes, with the right tools and preparation, you can safely remove drywall yourself.
3. What should I do if I find mold behind the drywall?
If you find mold, it's best to consult a professional for safe removal and remediation.
4. Is there a difference between drywall and plasterboard?
Yes, drywall is made from gypsum sandwiched between paper, while plasterboard is traditionally made from a heavier gypsum plaster.
5. How do I avoid damaging electrical wiring?
Use a stud finder to locate wires before cutting into the drywall. Always turn off the power to the area as well.
6. Can I recycle my old drywall?
Yes, many recycling centers accept drywall. Check with local facilities for details.
7. What is the best way to clean up after drywall removal?
Use a vacuum designed for construction debris and a damp cloth to wipe down surfaces.
8. Do I need a permit to remove drywall?
It depends on local regulations, especially if you’re removing load-bearing walls. Always check with your local building department.
9. How can I tell if the drywall is damaged?
Look for signs of water damage, mold, or cracks. A simple test is to tap on the surface; a hollow sound indicates it's likely intact.
10. What should I do with the removed drywall?
Ensure proper disposal at a landfill or recycling center, or consider donating usable pieces.
Random Reads