Effortless Guide to Removing Kitchen Countertops: A DIY Approach

-
Quick Links:
- Introduction
- Tools and Materials Needed
- Safety First: Precautions to Take
- Step-by-Step Guide to Removing Kitchen Countertops
- Case Studies: Real-Life Examples
- Expert Insights on Countertop Removal
- Common Mistakes to Avoid
- Conclusion
- FAQs
Introduction
Removing kitchen countertops can seem like a daunting task, especially for those who are not experienced in DIY home improvements. However, with the right tools, materials, and a clear plan, you can successfully remove your countertops and prepare your kitchen for a new look. This comprehensive guide will walk you through the process step by step, ensuring you have all the information you need to tackle this project with confidence.
Tools and Materials Needed
Before diving into the removal process, it’s critical to gather the necessary tools and materials. Here’s a list of what you’ll need:
- Utility knife
- Screwdriver (flathead and Phillips)
- Reciprocating saw or jigsaw
- Hammer
- Chisel
- Safety goggles
- Dust mask
- Drop cloths
- Pry bar
- Measuring tape
- Level
- Caulk remover (if applicable)
Safety First: Precautions to Take
Safety should always come first when undertaking any DIY project. Here are some precautions to consider:
- Wear safety goggles and a dust mask to protect your eyes and lungs.
- Ensure the work area is well-ventilated.
- Disconnect electricity to any appliances that may be attached to the countertops.
- Be cautious of sharp edges and heavy materials.
Step-by-Step Guide to Removing Kitchen Countertops
Step 1: Preparing the Workspace
Start by clearing the countertops of any items, including appliances, utensils, and decor. Lay down drop cloths to protect your kitchen surfaces from dust and debris.
Step 2: Disconnecting Appliances
If you have a sink, stovetop, or any appliances built into your countertops, you will need to disconnect them before removal. For sinks, turn off the water supply and disconnect the plumbing. For stovetops, unplug and remove the unit.
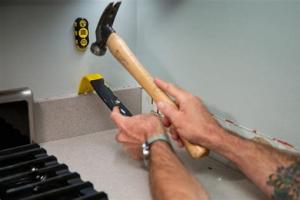
Step 3: Removing the Backsplash
Carefully remove any backsplash attached to the countertops. Use a utility knife to cut through caulk or adhesive, and gently pry it away with a pry bar.
Step 4: Unscrewing the Countertops
Check underneath the countertops for screws or brackets holding them in place. Use the appropriate screwdriver to remove these fasteners.
Step 5: Cutting the Countertops
If your countertops are large, it may be easier to cut them into smaller sections for removal. Use a reciprocating saw or jigsaw to carefully cut through the material.
Step 6: Lifting Off the Countertops
With the screws removed and any cuts made, it’s time to lift the countertops off the cabinets. This may require assistance, as countertops can be heavy.
Step 7: Cleaning Up
After removing the countertops, clean the area thoroughly. Remove any leftover adhesive, dust, and debris to prepare for the installation of new countertops.
Case Studies: Real-Life Examples
Understanding how others have successfully removed their kitchen countertops can provide valuable insights. Here are a couple of case studies:
Case Study 1: DIY Removal of Laminate Countertops
A homeowner decided to remove their outdated laminate countertops to install granite. By following a step-by-step process and ensuring they had help lifting the heavy granite, they completed the task in a weekend.
Case Study 2: Quartz Countertop Removal
Another individual attempted to remove quartz countertops, which proved more challenging due to weight. They utilized a professional’s advice on proper cutting techniques and successfully completed the project with minimal damage to the cabinets.
Expert Insights on Countertop Removal
Expert contractors emphasize the importance of planning and preparation. They suggest documenting the process through photos for future reference, especially if you plan to reinstall or replace the countertops.
Common Mistakes to Avoid
Here are some common mistakes to steer clear of when removing kitchen countertops:
- Forgetting to disconnect plumbing and electrical connections.
- Not having enough help during the removal process.
- Rushing through the cutting process, leading to mistakes.
Conclusion
Removing kitchen countertops may seem overwhelming, but with careful planning and the right tools, it can be an easy DIY project. Remember to prioritize safety, take your time, and follow the steps outlined in this guide to ensure a successful countertop removal.
FAQs
1. How long does it take to remove kitchen countertops?
It typically takes a few hours to a full day, depending on the size and type of the countertops.
2. Can I remove countertops by myself?
Yes, but it’s recommended to have at least one helper, especially with heavier materials.
3. What tools do I need to remove countertops?
You will need a utility knife, screwdriver, reciprocating saw, and pry bar, among other tools.
4. Is it necessary to hire a professional?
It’s not necessary if you feel comfortable doing it yourself, but hiring a professional can ensure it’s done correctly.
5. What should I do with the old countertops?
Consider donating them, recycling, or repurposing them for other projects.
6. How do I prepare my kitchen for new countertops?
Ensure the area is clean and free of debris, and check for any necessary repairs on cabinets or walls.
7. Can I remove countertops without damaging cabinets?
Yes, but it requires careful cutting and lifting to avoid damaging the cabinets underneath.
8. What if my countertops are glued down?
Use a utility knife to cut the adhesive and a pry bar to gently lift them off.
9. Are there any safety concerns I should be aware of?
Always wear safety goggles and a dust mask and ensure that the workspace is well-ventilated.
10. How can I find replacement countertops?
Research local suppliers, home improvement stores, or consider custom options from fabricators.