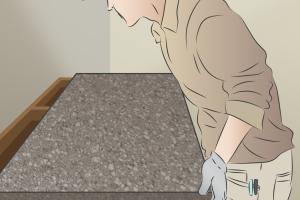
Ultimate Guide: How to Repair a Crack in Granite Like a Pro

-
Quick Links:
- Introduction
- Understanding Granite
- Types of Cracks in Granite
- Tools and Materials Needed
- Step-by-Step Guide to Repairing Cracks
- Case Studies: Success Stories
- Expert Insights and Tips
- Granite Maintenance Tips
- FAQs
Introduction
Granite is a popular choice for countertops, floors, and other surfaces due to its durability and aesthetic appeal. However, like any material, it can become damaged over time. Cracks in granite can be unsightly and may worsen if not addressed promptly. In this comprehensive guide, we will explore how to repair a crack in granite effectively, ensuring your surfaces remain beautiful and functional.
Understanding Granite
Granite is an igneous rock composed primarily of quartz, feldspar, and mica. This natural stone is renowned for its strength and resistance to heat and scratches. Understanding the composition of granite helps in recognizing how to repair it effectively.
Composition of Granite
- Quartz: Provides hardness and durability.
- Feldspar: Contributes to the stone's color and texture.
- Mica: Adds shine and luster.
Benefits of Granite
- Durable and long-lasting
- Heat and scratch-resistant
- Available in various colors and patterns
Types of Cracks in Granite
Before attempting to repair a crack in granite, it's essential to identify the type of crack you are dealing with. There are several common types:
1. Surface Cracks
These are shallow cracks that do not penetrate deeply into the stone. They can often be repaired with resin or epoxy.
2. Structural Cracks
These cracks indicate a more severe problem, often related to the underlying support structure. Professional assessment is recommended.
3. Hairline Cracks
These are very thin cracks that are difficult to notice. They can usually be filled with a specialized adhesive.
Tools and Materials Needed
To effectively repair a crack in granite, you will need the following tools and materials:
- Granite adhesive or epoxy
- Putty knife
- Dremel tool or drill
- Sandpaper (various grits)
- Cloth or sponge
- Masking tape
- Acetone or cleaner for surface preparation
Step-by-Step Guide to Repairing Cracks
Now that you have gathered your tools and materials, follow these steps to repair a crack in your granite surface:
Step 1: Clean the Area
Start by cleaning the area surrounding the crack with acetone or a suitable cleaner to remove any dirt, oil, or residue. Allow it to dry completely.
Step 2: Prepare the Crack
Using a Dremel tool or drill, widen the crack slightly to allow the adhesive to penetrate better. Be careful not to damage the surrounding granite.
Step 3: Apply Adhesive
Mix the granite adhesive according to the manufacturer's instructions. Using a putty knife, apply the adhesive into the crack, ensuring it fills the entire gap. Smooth the surface for an even finish.
Step 4: Clamp and Allow to Cure
If necessary, use masking tape or clamps to hold the crack closed while the adhesive cures. Allow the adhesive to set according to the manufacturer's instructions, typically 24 hours.
Step 5: Sand the Surface
Once the adhesive is fully cured, use sandpaper to smooth the surface of the repair. Start with a coarser grit and gradually move to a finer grit for a polished finish.
Step 6: Clean and Polish
After sanding, clean the area again to remove any dust or debris. Optionally, apply a granite polish to restore the shine to the repaired area.
Case Studies: Success Stories
Here, we highlight a few real-world examples of successful granite repairs:
Case Study 1: Kitchen Countertop Repair
A homeowner discovered a hairline crack in their granite kitchen countertop. After following the step-by-step guide, they successfully filled the crack and restored the countertop's appearance without professional help.
Case Study 2: Bathroom Vanity Restoration
Another homeowner faced a larger structural crack in their bathroom vanity. They contacted a professional who used a specialized epoxy and provided a warranty for the repair, ensuring peace of mind.
Expert Insights and Tips
We consulted with granite repair specialists to provide you with additional tips for successful repairs:
- Regular Maintenance: Keep your granite sealed and clean to prevent further damage.
- Immediate Action: Address cracks as soon as they appear to prevent worsening.
- Choose Quality Materials: Always use high-quality adhesives designed for granite.
Granite Maintenance Tips
Maintaining your granite surfaces can help prevent damage and prolong their lifespan. Consider the following tips:
- Seal your granite every 1-3 years, depending on usage.
- Use coasters and cutting boards to avoid scratches.
- Clean spills immediately to prevent staining.
FAQs
1. Can I repair a crack in granite myself?
Yes, many minor cracks can be repaired with DIY methods using epoxy or adhesive.
2. How long does it take for granite adhesive to cure?
Typically, granite adhesive takes about 24 hours to fully cure, but check the manufacturer’s instructions.
3. What type of adhesive should I use for granite repairs?
Use high-quality epoxy or specialized granite adhesive for the best results.
4. How can I prevent cracks in my granite?
Regular maintenance, sealing, and using protective measures can help prevent cracks.
5. Is it necessary to hire a professional for granite repairs?
For large structural cracks, hiring a professional is recommended to ensure proper repair.
6. Can I use super glue for granite cracks?
Super glue is not recommended as it may not bond well with granite. Use specialized granite adhesives instead.
7. How do I know if a crack is serious?
If the crack is deep, wide, or affects the structure, it is advisable to consult a professional.
8. Can granite be repaired if it is chipped?
Yes, chips can often be repaired using epoxy or resin fillers.
9. What is the best way to clean granite surfaces?
Use a pH-balanced stone cleaner to avoid damaging the surface.
10. How often should I seal my granite?
Granite should be sealed every 1-3 years, depending on usage and wear.
Random Reads