3 Easy Ways to View Your Web Browsing History on Mac

-
Quick Links:
- Introduction
- Method 1: Viewing History in Safari
- Method 2: Checking History in Google Chrome
- Method 3: Accessing History in Mozilla Firefox
- Case Studies and Examples
- Expert Insights
- Conclusion
- FAQs
Introduction
In our digital age, web browsing history is a treasure trove of information about our online habits. Whether you're trying to revisit a website you found helpful or need to manage your digital footprint, knowing how to access your browsing history on a Mac is essential. This article will guide you through three easy methods to view your web browsing history on Mac, specifically focusing on the popular browsers: Safari, Google Chrome, and Mozilla Firefox.
Method 1: Viewing History in Safari
Safari is the default web browser for Mac, and it provides a straightforward way to access your browsing history. Here’s a step-by-step guide:
Step 1: Open Safari
Launch the Safari browser by clicking its icon in the Dock or searching for it using Spotlight.
Step 2: Access the History Menu
Once Safari is open, navigate to the top menu bar and click on History.
Step 3: View Your History
From the dropdown menu, you can see a list of your recent browsing activities. You can choose Show All History to open a new window displaying all your past visits organized by date.
Step 4: Search Your History
If you are looking for a specific website, use the search bar at the top right of the history window. Simply type in the keywords related to the site you want to find.
Step 5: Clear History (Optional)
If you wish to delete certain items from your history, select the specific entry or entries, right-click, and choose Delete.
Method 2: Checking History in Google Chrome
Google Chrome is known for its speed and user-friendly interface. Here’s how you can view your history in Chrome:
Step 1: Open Google Chrome
Launch Chrome by clicking its icon in the Dock or using Spotlight.
Step 2: Access the History Page
Click on the three vertical dots at the top-right corner to open the menu, then hover over History. Click on History again from the side menu, or simply press Cmd + Y on your keyboard.
Step 3: Browse Your History
Here, you will see a list of all your browsing history. Like Safari, you can search for specific pages using the search bar at the top.
Step 4: Manage Your History
To remove entries, check the box next to the items you want to delete and click on Delete at the top right.
Method 3: Accessing History in Mozilla Firefox
Firefox also has its unique way of managing browsing history. Follow these steps:
Step 1: Open Mozilla Firefox
Click on the Firefox icon to launch the browser.
Step 2: Open the History Menu
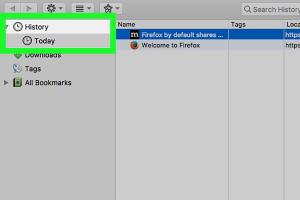
Click on the Library icon (looks like books on a shelf) located on the toolbar, then select History from the dropdown menu.
Step 3: View Your Browsing History
You can view your browsing history by selecting Show All History. This will bring up a window displaying your history organized by date and site.
Step 4: Search and Delete History
To find a specific entry, use the search bar. To delete, right-click on the entries and select Delete Page.
Case Studies and Examples
Understanding how to manage your browsing history can significantly enhance your browsing experience. For instance, a study conducted by the Pew Research Center indicated that 60% of users occasionally revisit websites they have previously visited. Efficient access to browsing history can save time and improve productivity.
Expert Insights
According to cybersecurity experts, regularly checking and managing your browsing history can help you maintain a cleaner, safer browsing environment. It’s also crucial for privacy management, especially in shared devices.
Conclusion
Accessing your web browsing history on a Mac is a simple process, whether you use Safari, Google Chrome, or Mozilla Firefox. By following the methods outlined above, you can easily manage your online activities, revisit useful resources, and maintain your digital footprint.
FAQs
- How can I find my browsing history on a Mac? You can check your history via the History menu in Safari, Chrome, or Firefox.
- Can I recover deleted browsing history on Mac? Once deleted, recovering browsing history can be challenging without specialized software.
- Is browsing history stored permanently? Not necessarily, as history can be set to auto-delete after a certain period.
- Can I view incognito browsing history on Mac? No, incognito mode does not store history.
- How do I clear my entire browsing history? Use the clear history options in your browser settings.
- Does clearing history affect bookmarks? No, bookmarks will remain intact if you clear your browsing history.
- How often should I clear my browsing history? It depends on your preference, but regularly clearing it can help maintain privacy.
- Can I see someone else's browsing history on my Mac? Only if you have access to their user account or if they haven't cleared their history.
- Is there a keyboard shortcut to view history in Safari? Yes, you can press Cmd + Y.
- Are browser histories synced across devices? Yes, if you are signed in to the same account and have sync enabled.
Random Reads
- How to raise a dorm bed
- How to raise friendship level in pokemon games
- How to use ftp
- How to use function keys without pressing fn windows 10
- Mastering happy wheels guide
- Mastering hammer safety ultimate guide
- Transfer whatsapp new phone same number
- Translate web page methods
- Ultimate guide scrubbing acrylic bathtub
- How to mix different shades of green paint