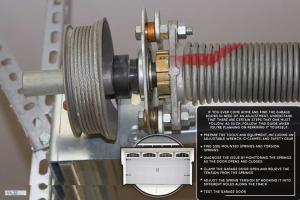
Mastering Garage Door Spring Adjustment: A Step-by-Step Guide for Homeowners

-
Quick Links:
- Introduction
- Understanding Garage Door Springs
- Types of Garage Door Springs
- Safety First
- Tools Needed for Adjustment
- Step-by-Step Adjustment Guide
- Common Issues and Solutions
- Case Studies
- Expert Insights
- Conclusion
- FAQs
Introduction
Garage doors are an essential component of our homes, providing security and convenience. But when a garage door spring is out of adjustment, it can lead to significant problems, including difficulty opening and closing the door. In this guide, we will explore the ins and outs of adjusting garage door springs, ensuring you can tackle this task safely and effectively.
Understanding Garage Door Springs
Garage door springs are crucial for the smooth operation of your door. They counterbalance the weight of the door, allowing it to open and close with minimal effort. Understanding how these springs work is essential before attempting any adjustments.
How Garage Door Springs Work
Garage door springs store energy and release it to lift the door. When the door is closed, the springs are under tension. When you activate the garage door opener, the energy is released, allowing the door to open.
Types of Garage Door Springs
There are two main types of garage door springs:
- Torsion Springs: Located above the door, these springs provide the lifting force by twisting.
- Extension Springs: Found on either side of the door, these springs stretch to provide lift.
Safety First
Working with garage door springs can be dangerous due to the high tension they are under. Always prioritize safety by wearing protective gear and following the necessary precautions.
Tools Needed for Adjustment
Before you begin adjusting your garage door springs, gather the following tools:
- Wrench set
- Screwdriver
- Measuring tape
- Ladder
- Safety glasses
- Gloves
- Clamp locks or vice grips
Step-by-Step Adjustment Guide
Follow these steps to adjust your garage door springs safely:
Step 1: Disconnect the Garage Door Opener
Start by unplugging the garage door opener for safety. This prevents any accidental operation while you work on the springs.
Step 2: Inspect the Springs
Check both torsion and extension springs for any signs of wear or damage. If any are broken or excessively worn, consider replacing them instead of adjusting.
Step 3: Adjusting Torsion Springs
- Locate the winding cone at the end of the torsion spring.
- Using a wrench, turn the cone clockwise to increase tension or counterclockwise to decrease tension. Make small adjustments, typically 1/4 turn at a time.
- Secure the cone with a set screw after making the adjustments.
Step 4: Adjusting Extension Springs
- Locate the spring adjustment clips on each side of the garage door.
- To increase tension, move the clip up one hole; to decrease tension, move it down.
- Repeat for the other side to ensure balanced tension.
Step 5: Test the Door
Reconnect the garage door opener and test the door to ensure it opens and closes smoothly. Make further adjustments if necessary.
Common Issues and Solutions
Several issues may arise with garage door springs:
- Door Not Opening Fully: This may indicate too much tension in the springs. Adjust accordingly.
- Door Reverses While Closing: This could mean the springs are too loose. Tighten them slightly.
- Unbalanced Door: Check if both sides of the springs are adjusted evenly.
Case Studies
Consider the following examples of garage door spring adjustments:
- Case Study 1: A homeowner noticed their garage door was heavy and hard to lift. After a thorough inspection, they adjusted the torsion springs by half a turn, resulting in a smooth operation.
- Case Study 2: Another homeowner faced issues with their door reversing unexpectedly. After adjusting the extension springs, they were able to restore proper functionality.
Expert Insights
Experts recommend regular inspections of garage door springs every 6 months. This proactive approach can prevent major issues and ensure safe operation.
Conclusion
Adjusting garage door springs is a manageable DIY task if approached with caution and knowledge. By following this guide, you can ensure your garage door operates smoothly and safely.
FAQs
- 1. How often should I adjust my garage door springs? It's recommended to inspect and adjust them every six months.
- 2. Can I adjust garage door springs myself? Yes, but ensure you take all safety precautions.
- 3. What happens if I adjust springs too much? Over-adjustment can lead to door imbalance or malfunction.
- 4. How do I know if my springs are broken? Look for visible gaps or rust on the springs.
- 5. Is it safe to work on garage door springs? Yes, as long as you follow safety protocols and guidelines.
- 6. What tools do I need for the adjustment? A wrench set, screwdriver, measuring tape, and safety gear.
- 7. Can I use lubricant on garage door springs? Yes, applying a suitable lubricant can reduce wear and tear.
- 8. How long do garage door springs last? Typically, they last about 7-9 years, depending on usage.
- 9. Can garage door springs be replaced? Yes, if they are broken or worn out, they should be replaced.
- 10. What should I do if I'm uncomfortable adjusting the springs? Consider hiring a professional for the adjustment.
Random Reads
- How to remove red wine stain hardwood floor
- How to use amazon fire tv stick without remote
- How to use allshare
- Mastering formica cutting
- Mastering fashion gta san andreas
- How to use document templates in microsoft word
- Permanently delete microsoft account
- How to remove shortcut virus
- How to wash a cowhide rug
- How to wallpaper a room