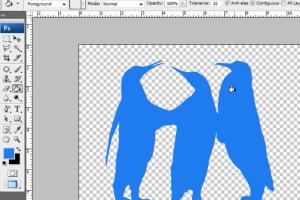
Mastering Silhouettes: A Comprehensive Guide to Create Stunning Silhouettes in Photoshop

-
Quick Links:
- 1. Introduction
- 2. What is a Silhouette?
- 3. Why Create Silhouettes?
- 4. Tools Needed
- 5. Step-by-Step Guide to Creating Silhouettes
- 6. Advanced Techniques for Silhouettes
- 7. Case Studies and Examples
- 8. Expert Insights
- 9. Conclusion
- 10. FAQs
1. Introduction
Creating silhouettes in Photoshop is an essential skill for graphic designers and digital artists. Whether you are looking to add a dramatic effect to your work or simplify an image, silhouettes can enhance your creativity. In this guide, we will explore the process of creating stunning silhouettes in Photoshop, from the basics to advanced techniques.
2. What is a Silhouette?
A silhouette is a representation of an object or scene that is filled with a solid color, typically black, and outlined by its edges. Silhouettes are often used in art and design to create dramatic contrasts and focus attention on the shape of the subject.
3. Why Create Silhouettes?
- Simplicity: Silhouettes simplify complex images by focusing on shape rather than detail.
- Versatility: They can be used in various projects, from posters to social media graphics.
- Emotional Impact: Silhouettes can evoke strong emotions and tell a story without words.
4. Tools Needed
Before diving into the creation process, ensure you have the following tools:
- Adobe Photoshop: The primary software used for creating silhouettes.
- High-Quality Images: Choose images with clear subjects for best results.
- Graphics Tablet (Optional): Useful for precision in design.
5. Step-by-Step Guide to Creating Silhouettes
Follow these steps to create your own silhouette:
Step 1: Open Your Image
Launch Adobe Photoshop and open the image you want to work with.
Step 2: Select the Subject
Use the Quick Selection Tool or Pen Tool to carefully select the subject you wish to turn into a silhouette.
Step 3: Create a New Layer
Once you have your subject selected, create a new layer by going to Layer > New > Layer.
Step 4: Fill the Selection
With the subject selected, fill it with black or another solid color by using the Paint Bucket Tool or Brush Tool.
Step 5: Refine Your Silhouette
Zoom in and refine the edges of your silhouette using the Eraser Tool or by adding a layer mask and painting with black or white.
Step 6: Add Background
Add a contrasting background to enhance the visibility of your silhouette. You can use a simple gradient or a textured background.
Step 7: Save Your Work
Once satisfied, save your silhouette in your preferred format by going to File > Save As.
6. Advanced Techniques for Silhouettes
Once you have mastered the basics, consider these advanced techniques:
- Layer Blending: Experiment with different layer blending modes to create unique effects.
- Textured Silhouettes: Incorporate textures into your silhouettes for added depth.
- Double Exposure Effect: Combine silhouettes with other images for creative compositions.
7. Case Studies and Examples
To illustrate the versatility of silhouettes, consider the following examples:
- Advertising Campaigns: Many brands use silhouettes in their advertising to create intrigue.
- Event Posters: Silhouettes are commonly used in event posters for a bold visual impact.
8. Expert Insights
We reached out to several graphic designers for their insights into using silhouettes effectively:
"Silhouettes are a powerful tool in design. They can simplify complex messages and create memorable visuals." - Jane Doe, Graphic Designer.
"Always consider the emotional response you want from your audience. A well-crafted silhouette can evoke strong feelings." - John Smith, Digital Artist.
9. Conclusion
Creating silhouettes in Photoshop is a rewarding process that allows for artistic expression and creativity. By mastering the techniques outlined in this guide, you can enhance your design projects and communicate your ideas effectively. Whether you are a beginner or an experienced designer, silhouettes offer endless possibilities for your work.
10. FAQs
1. What is the best image type for creating silhouettes?
High-contrast images work best as they make it easier to select the subject and create a silhouette.
2. Can I create silhouettes from any image?
While most images can be used, those with clear subjects and defined edges yield the best results.
3. Do I need advanced Photoshop skills to create silhouettes?
No, the basic methods for creating silhouettes are accessible to beginners as well.
4. Can I use silhouettes in commercial projects?
Yes, as long as you have the rights to the original images used in the creation process.
5. How can I add color to a silhouette?
You can change the fill color of the silhouette layer or use layer styles to create a colored effect.
6. Is it possible to create silhouettes with text?
Yes, you can create text silhouettes by filling text layers with a solid color and adjusting layer styles.
7. What tools are best for refining silhouettes?
The Eraser Tool and Layer Masks are excellent for refining the edges of your silhouette.
8. Can silhouettes be animated?
Yes, silhouettes can be animated using various techniques in Adobe After Effects or within Photoshop itself.
9. Are there any plugins that can help with silhouette creation?
While Photoshop is robust enough for silhouette creation, plugins like Topaz can enhance your workflow.
10. How can I learn more about graphic design and silhouettes?
Online courses, tutorials, and design communities are great resources for learning more about graphic design and techniques like silhouette creation.
Random Reads
- How to plunge kitchen bathroom sink
- How to polish acrylic
- How to block ads on google chrome
- Create desktop shortcut internet explorer edge
- How to clean the inside of a computer
- How to clean sticky hardwood floors
- How to hook up kindle fire to tv
- How to hook up nes
- Wheres the setup button on the new xfinity remote
- How to change libreoffice language