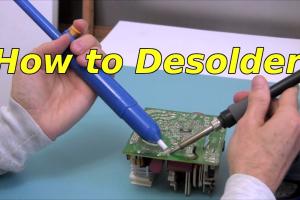
Mastering Desoldering: A Comprehensive Guide for Beginners and Experts

-
Quick Links:
- 1. Introduction
- 2. Understanding Soldering
- 3. Tools Required for Desoldering
- 4. Desoldering Techniques
- 5. Step-by-Step Guide to Desoldering
- 6. Common Mistakes to Avoid
- 7. Case Studies
- 8. Expert Insights and Tips
- 9. FAQs
1. Introduction
Desoldering is an essential skill for anyone working with electronics, whether you're a hobbyist, a technician, or a professional engineer. In this comprehensive guide, we'll explore the intricacies of desoldering, from the tools required to the various techniques and common mistakes to avoid.2. Understanding Soldering
Soldering is a process used to join electronic components together by melting solder, a fusible metal alloy, to create a connection. It is a crucial step in electronics assembly. Understanding the fundamentals of soldering will enhance your desoldering efforts, as you'll know what to look for when removing components.The Basics of Solder
- **Types of Solder:** Lead-based, lead-free, and specialty solders. - **Melting Points:** Understanding the melting point of solder is crucial for effective desoldering.3. Tools Required for Desoldering
Having the right tools is imperative for successful desoldering. Here are the essential tools you will need: 1. **Soldering Iron:** A good quality soldering iron with adjustable temperature settings. 2. **Desoldering Pump:** A vacuum tool that sucks up molten solder. 3. **Desoldering Braid:** A copper braid that absorbs solder when heated. 4. **Flux:** Enhances solder flow and improves desoldering efficiency. 5. **Tweezers:** For handling small components. 6. **Safety Goggles:** Protect your eyes while working.4. Desoldering Techniques
There are several effective techniques for desoldering. Each method has its benefits, and the choice often depends on the specific situation.Desoldering Pump Technique
- Heat the solder joint with the soldering iron. - Quickly place the desoldering pump over the molten solder and activate it to suck the solder away.Desoldering Braid Technique
- Place the desoldering braid over the solder joint. - Heat the braid with a soldering iron, allowing the solder to wick into the braid.5. Step-by-Step Guide to Desoldering
Follow these detailed steps to successfully desolder a component from a PCB: 1. **Preparation:** Gather your tools and prepare your workspace. 2. **Identify the Component:** Locate the component you wish to remove. 3. **Apply Flux:** Apply a small amount of flux to the solder joint to improve flow. 4. **Heat the Solder:** Use the soldering iron to heat the solder until it melts. 5. **Remove Solder:** Use either the desoldering pump or braid to remove the solder. 6. **Clean the Pads:** Once the solder is removed, clean the pads with isopropyl alcohol. 7. **Inspect:** Check for any damage to the PCB or pads.6. Common Mistakes to Avoid
- **Overheating Components:** This can cause damage to the PCB or the component. - **Not Using Flux:** Flux is essential for effective desoldering. - **Ignoring Safety Precautions:** Always wear safety goggles and work in a well-ventilated area.7. Case Studies
Explore real-world examples of desoldering challenges faced by enthusiasts and professionals, showcasing effective solutions and techniques.Case Study 1: Reviving Vintage Electronics
A detailed look at how desoldering played a critical role in restoring a vintage radio, including techniques and tools used.8. Expert Insights and Tips
Experts share their insights on how to improve your desoldering skills and avoid common pitfalls. - **Stay Patient:** Rushing can lead to mistakes. - **Practice:** Gain experience on scrap boards before tackling important projects.9. FAQs
Frequently Asked Questions
1. What is desoldering?
Desoldering is the process of removing solder from electronic components or circuit boards.
2. What tools do I need for desoldering?
You need a soldering iron, desoldering pump, desoldering braid, flux, tweezers, and safety goggles.
3. Can I desolder without a desoldering pump?
Yes, you can use desoldering braid as an alternative.
4. Is desoldering difficult?
It can be challenging for beginners, but with practice, it becomes easier.
5. How do I avoid damaging my PCB while desoldering?
Use the right temperature and tools, and practice careful technique.
6. What is the best temperature for desoldering?
A temperature between 350°C and 400°C is generally effective.
7. Can I reuse components after desoldering?
Yes, if done properly, components can be reused without damage.
8. How can I clean the PCB after desoldering?
Use isopropyl alcohol and a brush to clean the area.
9. What should I do if I can't remove all the solder?
Reapply flux and heat the joint again, and try using desoldering braid or a pump.
10. Are there any safety precautions I should take?
Always wear safety goggles and work in a well-ventilated area to avoid fumes.
Random Reads