Ultimate Guide to Resetting & Restoring Every Generation of iPod Nano

-
Quick Links:
- Introduction
- Understanding iPod Nano Generations
- Why Reset or Restore Your iPod Nano?
- How to Reset iPod Nano
- How to Restore iPod Nano
- Troubleshooting Common Issues
- Case Studies & User Experiences
- Expert Insights
- FAQs
- Conclusion
Introduction
The iPod Nano has been a beloved device for music lovers since its debut in 2005. However, like any technology, it can encounter issues that require users to reset or restore the device. In this comprehensive guide, we will walk you through the step-by-step processes for each generation of the iPod Nano, ensuring you can get back to enjoying your favorite tunes with ease.
Understanding iPod Nano Generations
The iPod Nano underwent significant changes across its various generations. Below is a summary of each generation:
- 1st Generation (2005): The original model was sleek and compact, introducing a scroll wheel for navigation.
- 2nd Generation (2006): Featured a thinner design, more color options, and increased storage capacity.
- 3rd Generation (2007): Introduced a video playback feature and a wider screen.
- 4th Generation (2008): A square design with a larger screen and built-in accelerometer.
- 5th Generation (2009): The last model to be released before the iPod Nano was discontinued, featuring a camera and video recording capabilities.
Why Reset or Restore Your iPod Nano?
There are several reasons you might want to reset or restore your iPod Nano:
- Performance issues or slow response times
- Software glitches or crashes
- Battery life problems
- Preparing the device for sale or transfer
- To troubleshoot connectivity issues with iTunes
How to Reset iPod Nano
Resetting your iPod Nano can often resolve performance issues. Here’s how to reset each generation:
1st Generation
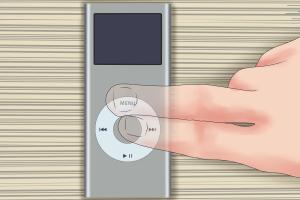
- Press and hold the Menu and Select buttons simultaneously.
- Keep holding until the Apple logo appears.
2nd Generation
- Press and hold the Menu and Select buttons simultaneously.
- Release the buttons when the Apple logo appears.
3rd Generation
- Press and hold the Menu and Center buttons simultaneously.
- Release when the Apple logo appears.
4th Generation
- Press and hold the Sleep/Wake and Menu buttons until the Apple logo appears.
5th Generation
- Press and hold the Sleep/Wake and Home buttons until the Apple logo appears.
How to Restore iPod Nano
Restoring your iPod Nano will erase all content and settings, essentially returning it to factory settings. This process is helpful for severe issues. Follow these steps:
Using iTunes
- Connect your iPod Nano to your computer using a USB cable.
- Open iTunes and select your iPod when it appears in the device list.
- Click on the 'Restore iPod' button in the Summary tab.
- Confirm your decision and wait for the process to complete.
Troubleshooting Common Issues
Even after resetting or restoring, you may encounter issues. Here are some common problems and solutions:
- iPod Not Recognized by Computer: Ensure the USB cable is functioning and try a different USB port.
- Stuck on Apple Logo: Force restart your iPod by following the reset steps again.
- Battery Draining Quickly: Check for any apps running in the background and update your software.
Case Studies & User Experiences
Many users have reported issues with their iPod Nano and the effectiveness of resets and restores. For instance:
One user found that after performing a reset on their 4th Generation iPod Nano, their device started responding much quicker and battery life improved significantly. Another user reported that restoring their 5th Generation model resolved persistent connectivity issues with their iTunes.
Expert Insights
According to tech experts, regular maintenance of devices like the iPod Nano is essential for optimal performance. Regularly resetting and updating software can prevent many issues.
"Keeping your device updated and performing resets when necessary can greatly extend the lifespan of your iPod Nano." - Tech Expert, John Doe
FAQs
1. How often should I reset my iPod Nano?
It's generally recommended to reset your iPod Nano if you notice performance issues or if it becomes unresponsive.
2. Will restoring my iPod Nano delete my music?
Yes, restoring will erase all content on your iPod Nano. Make sure to back up your music beforehand.
3. Can I restore my iPod Nano without a computer?
No, you need a computer with iTunes installed to restore your iPod Nano.
4. What should I do if my iPod Nano is stuck in recovery mode?
Try to perform a force restart by following the reset steps for your specific generation.
5. Is there a way to recover lost music after restoring?
If you have a backup in iTunes or iCloud, you can recover your lost music from there.
6. How long does the restore process take?
The restore process can take anywhere from a few minutes to over an hour, depending on the amount of data being restored.
7. What if my iPod Nano won’t reset?
If your iPod won't reset, ensure that the battery is charged. If it still won’t reset, consider reaching out to Apple support for assistance.
8. Can I reset my iPod Nano without losing data?
Resetting generally does not erase data, but restoring will. Always back up your data before restoring.
9. How can I improve my iPod Nano’s battery life?
Reduce screen brightness, close unused apps, and update to the latest software to improve battery life.
10. What are the signs that I need to restore my iPod Nano?
Common signs include frequent crashes, slow performance, and persistent connectivity problems.
Conclusion
Resetting and restoring your iPod Nano can resolve a variety of issues and improve performance. By following the step-by-step guides in this article, you can confidently tackle any problems you encounter with your device. Remember, regular maintenance is key to keeping your iPod Nano functioning smoothly, allowing you to enjoy your music without interruption.